
FITTING INSTRUCTIONS
-
Fitting your chain markers
NB: If you're using the guide plate keep the tab at the top of the rack.
-
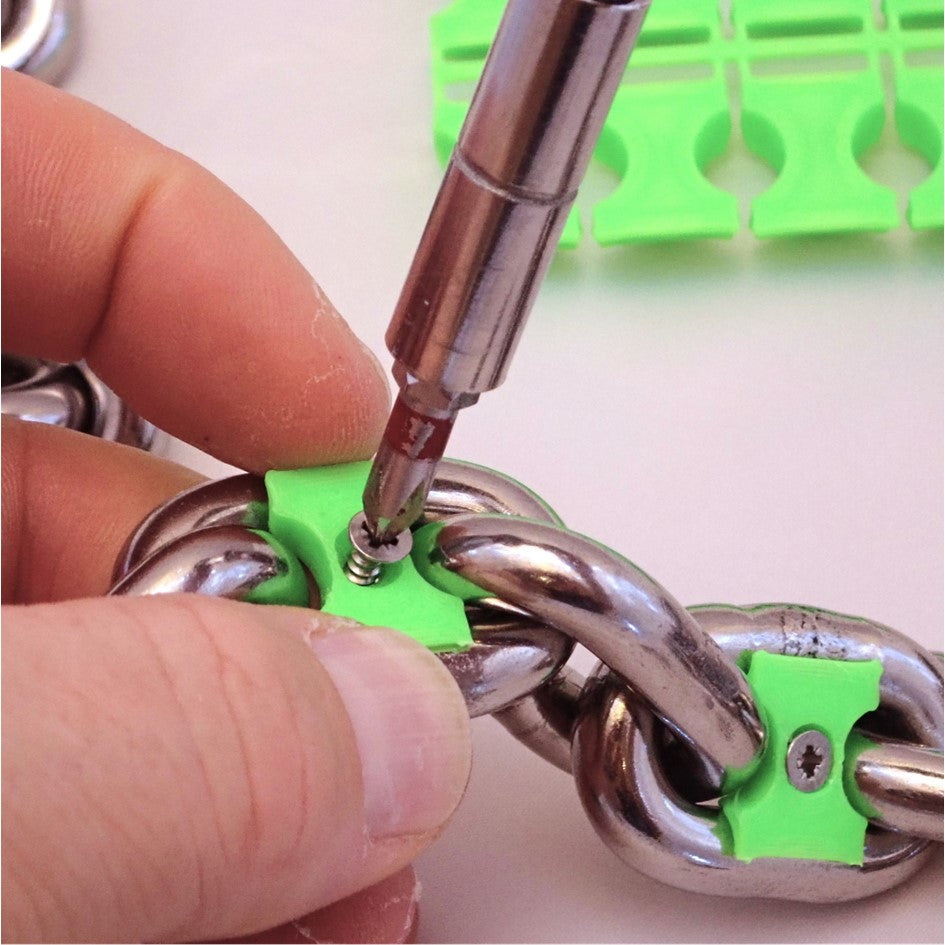
- Break the two opposite halves of the marker off the rack and place on either side of the chain link. One half will have a protrusion, the other a cavity and screw hole.
- Press together firmly to ensure they are aligned.
- Place the screw provided into the hole.
- Screw into place using a suitable screwdriver until screw bites. Do not over tighten.
- Markers can be removed and relocated if necessary.
.
-
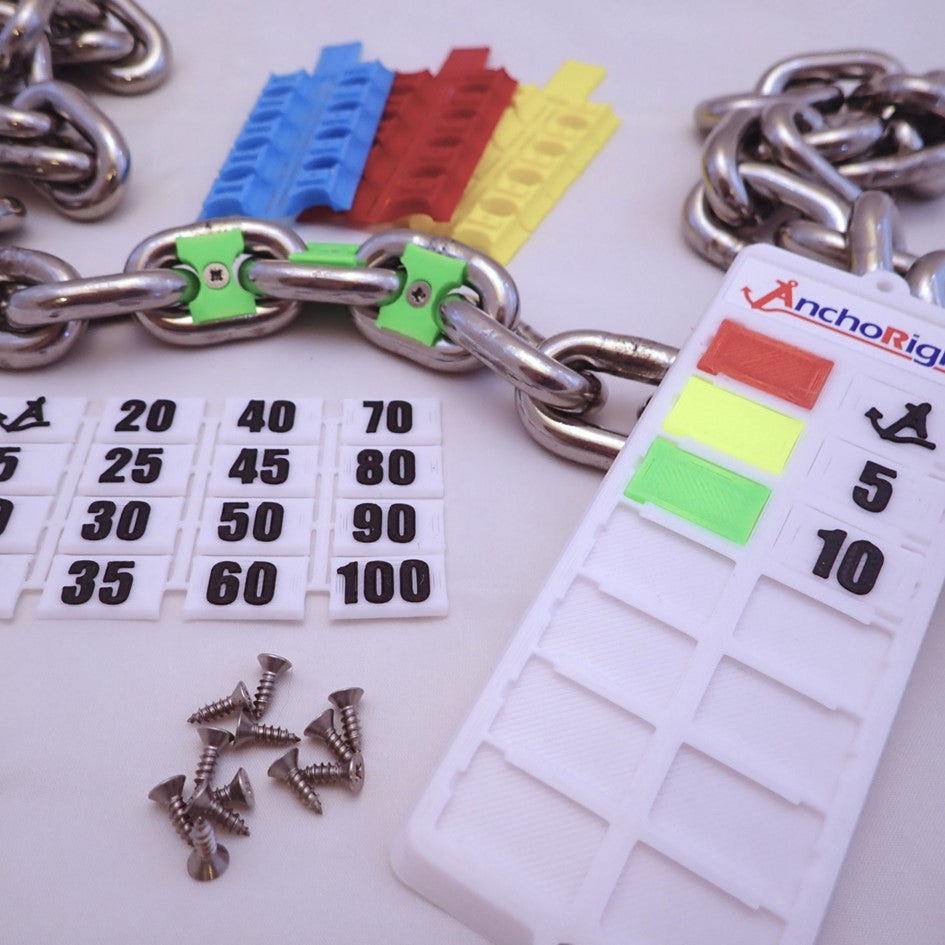
Building your guide plate
NB: Colour tabs are placed into the guide plate numbered (or “+”) side down.
.
We suggest you use the Anchor indicator as the first marked point with the markers about 1m up from the anchor and the stop sign towards the end of the chain to indicate when to stop paying it out.
.
Numbers will be down one side of the plate, colours down the other as per the picture above.
- Cut off the numbers required, ensuring clean ends, slot into the guide plate in one column, press firmly into place until flush. If they do not sit flush check both ends are clean as they are designed to be a tight fit.
- Cut the colour tabs off the rack of markers and ensure a clean edge on the end. Fit as above opposite the chosen numbers.
- Position on boat where easily visible when dropping anchor.
-
Suggested marking sequence
Our suggested sequence is to
- Use the Anchor indicator as the first marked point with the markers about 1m up from the anchor
- Use the stop sign towards the end of the chain to indicate when to stop paying out chain.
- Mark at 5m intervals from 2-20m
- Mark at 10m intervals from 30m upwards
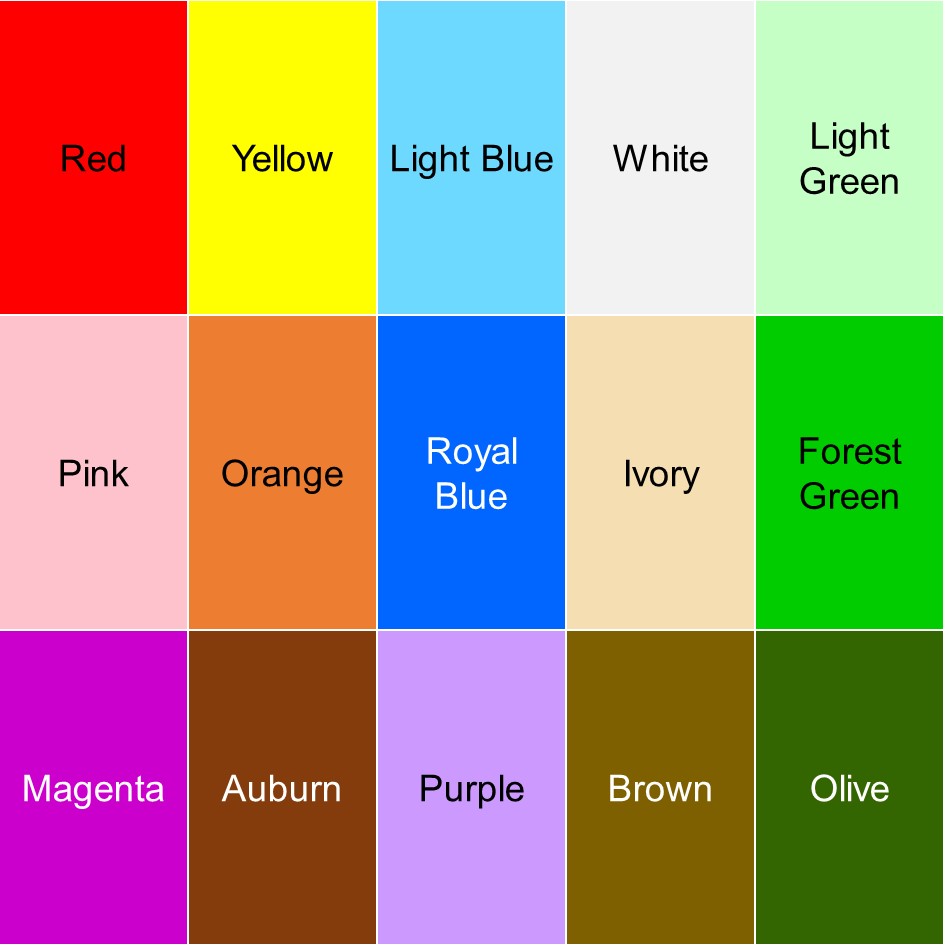
- Use the colours in the below sequence
- Red
- Yellow
- Light Blue
- White
- Light Green
- Pink
- Orange
- Royal Blue
- Ivory
- Forest Green
- Magenta
- Auburn
- Purple
- Brown
- Olive


